
Written by coh at home
[혼공스] 6주차 Ch7, 8 본문
숙제
p352 누적예제를 활용하여 본인의 할 일 목록을 만들어 캡쳐하기

<!DOCTYPE html>
<html lang="en">
<head>
<script>

document.addEventListener('DOMContentLoaded', () => {

    const todoList = document.querySelector('#todo-list')
    const input = document.querySelector('#todo')
    const addBtn = document.querySelector('#add-button')

    let keyCount = 0;
    const addTodo = () => {
        if (input.value.trim() === '') {
            alert ('Add your todo-list')
            return
        }
        const item = document.createElement('div')
        const checkBox = document.createElement('input')
        const text = document.createElement('span')
        const button = document.createElement('button')

        const key = keyCount
        keyCount += 1

        item.setAttribute('data-key', key)
        item.appendChild(checkBox)
        item.appendChild(text)
        item.appendChild(button)
        todoList.appendChild(item)

        checkBox.type = 'checkbox'
        checkBox.addEventListener('change', (e) => {
            item.style.textDecoration = e.target.checked ? 'line-through' : ''
        })

        text.textContent = input.value;
        button.textContent = 'remove'
        button.addEventListener('click', (e) => {
            // item.parentNode.removeChild(item)
            removeTodo(key);
        })

        input.value =''

    }
    const removeTodo = (key) => {
            const item = document.querySelector(`[data-key="${key}"]`)
            todoList.removeChild(item);
        }

    addBtn.addEventListener('click', addTodo)
        input.addEventListener('keyup', (e) => {
            const ENTER = 13;
            if (e.keyCode === ENTER)
                addTodo()
        })
})
</script>
<style>
    h1 { user-select: none;}
</style>
</head>
<body>
    <h1>할 일 목록</h1>
    <input id="todo" />
    <button id="add-button">ADD</button>
    <div id="todo-list"></div>
</body>
</html>
ch7 문서책체
html의 태그들을 자바스크립트에서는 document object라고 부른다. 이런 태그들로 만든 형태를 문서객체모델(DOM)이라고 한다.
DOMContentLoaded
<!DOCTYPE html>
<html>
    <head>
        <title>Doc</title>
    </head>
    <body>
    </body>
</html>
웹브라우저의 실행 순서는 다음과 같다.
- : html5문서구나
- html 태그 만들어야지
- head 태그 만들어야지
- title 태그가 있으니 반영해야지
- body 태그가 있으니 반영해야지
만약 body태그가 만들어지지 않았는데 body에 무언가를 출력하려고 하면 문제가 발생한다.
따라서 이를 해결하기 위해서, 웹브라우저가 문서 객체를 모두 읽고 나서 실행하는 이벤트가 DOMContentLoaded이다.
documnet.addEventListener('DOMContentLoaded', () => {
    const h1 = (text) => `<h1>${text}</h1>`;
    document.body.innerHTML += h1('hello');
});
문서객체 가져오기
head, body, title태그를 제외한 다른 요소들은 querySelector라는 메서드를 통해서 요소를 가져올 수 있다.
document.body
document.head
document.title

document.querySelector(선택자) // 문서객체 한 개
document.querySelctorAll(선택자) // 문서객체 여러개
선택자 부분에는 CSS 선택자를 입력해야한다. 기본적인 CSS 선택자는 다음과 같다.
| 이름 | 선택자형태 | 설명 |
|---|---|---|
| 태그 선택자 | 태그 | 특정 태그를 가진 요소 추출 |
| 아이디 선택자 | #아이디 | 특정 id 속성을 가진 요소를 추출 |
| 클래스 선택자 | .클래스 | 특정 class 속성을 가진 요소를 추출 |
| 속성 선택자 | [속성=값] | 특정 속성 값을 갖고 있는 요소를 추출 |
| 후손 선택자 | 선택자_A 선택자_B | 선택자_A 아래의 선택자_B를 선택 |
- querySelector
문서 객체 한 개 선택.
document.addEventListener('DOMContentLoaded', () => {
        const header = document.querySelector('h1')

        header.textContent = 'HEADER'
        header.style.color = 'white'
        header.style.backgroundColor = 'black'
        header.style.padding = '10px'
})- querySelectorAll
문서객체 여러 개 선택. forEach문을 사용해서 활용한다.
document.addEventListener('DOMContentLoaded', () => {
const header = document.querySelectorAll('h1')
header.forEach((header, idx) => {
header.textContent = 'HEADER_' + idx
header.style.color = 'white'
header.style.backgroundColor = 'black'
header.style.padding = '10px'
})
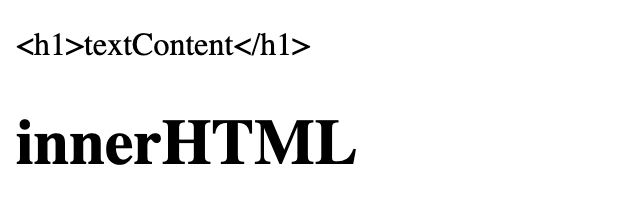
})글자 조작하기
| 속성이름 | 설명 |
|---|---|
| 문서객체.innerHTML | 입력된 문자열을 html형식으로 넣는다 |
| 문서객체.textContent | 입력된 문자열 그대로 넣는다 |
    document.addEventListener('DOMContentLoaded', () => {
        const a = document.querySelector('#a')
        const b = document.querySelector('#b')

        a.textContent = '<h1>textContent</h1>'
        b.innerHTML = '<h1>innerHTML</h1>'
    })
속성 조작하기
메서드를 통해 문서 객체의 속성을 조작할 수 있다. class, src, id 등 속성을 부여하거나 가져올 수 있다.
setAttribute(속성이름, 값)
getAttribute(속성이름)
    <img class="rect" />
    <img class="rect" />
    <img class="rect" />
    <img class="rect" />
...

document.addEventListener('DOMContentLoaded', () => {
        const rects = document.querySelectorAll('.rect');

        rects.forEach((rect, idx) => {
            const width = (idx + 1) * 100;
            const src = `http//placekitten.com/${width}/250`
            rect.setAttribute('src', src);
        })
    })
스타일 조작하기
문서 객체의 스타일을 먹이기 위해서 style 속성을 사용한다. CSS파일을 이용할 때와 이름이 살짝 다르다. 낙타표기법을 사용한다.
text-align -> textAlign 이렇게!
속성을 먹이는 방법은 다음과 같다.
h1.style.backgroundColor = 'black'
    document.addEventListener('DOMContentLoaded', () => {
        const divs = document.querySelectorAll('div')

        divs.forEach((div, idx) => {
            console.log(div, idx)
            const val = idx * 10;
            div.style.height = `10px`
            div.style.backgroundColor = `rgba(${val}, ${val}, ${val})`;
        });
    });
문서객체 생성하기
document.createElement(문서객체이름) 메서드를 통해 문서객체를 생성할 수 있고 이것을 어떤 요소 아래에 달 건지를 결정해야한다. 트리구조와 똑같다. 따라서 appendChild메서드가 있다.
부모객체.appendChild(자식객체);
document.addEventListener('DOMContentLoaded', () => {
    const h1 = document.createElement('h1');
    h1.textContent = 'hello';
    h1.style.color = 'white';
    h1.style.backgroundColor = 'black';
    h1.setAttribute("data-custom", '사용자 정의속성');
    document.body.appendChild(h1);
})
문서객체 이동하기
appendChild()는 문서객체를 이동할 때도 사용할 수 있다. 해당 객체에 대한 부모는 언제나 하나여야 한다.
따라서 문서객체를 다른 문서객체에 추가하면 문서 객체가 이동한다.
document.addEventListener('DOMContentLoaded', () => {

    const divA = document.querySelector('#first')
    const divB = document.querySelector('#second')

    const h1 = document.createElement('h1')
    h1.textContent = '이동하는 h1 tag'

    const toFirst = () => {
        divA.appendChild(h1);
        setTimeout(toSecond, 1000)
    }

    const toSecond = () => {
        divB.appendChild(h1);
        setTimeout(toFirst, 2000)

    }
    toFirst()
})
문서객체 제거하기
부모객체.removeChild(자식객체)
자식객체.parentNode.removeChild(자식객체)
자식은 부모에 parentNode를 통해 접근할 수 있다. 그래서 일반적으로 위와 같은 코드를 많이 사용한다.
    setTimeout(() => {
        const h1 = document.querySelector('h1')
        h1.parentNode.removeChild(h1);
    }, 3000);
이벤트 설정하기
addEventListener를 통해서 진행한다.
user-select:none 으로 지정하면, 해당태그를 마우스로 드래그할 수 없다.
<script>
document.addEventListener('DOMContentLoaded', () => {
    let count = 0;

    const h1 = document.querySelector('h1');
    h1.addEventListener('click', (e) => {
        count++;
        h1.textContent = count;
    });
})
</script>
<style>
    h1 { user-select: none;}
</style>
이벤트 제거하기
removeEventListener를 통해서 제거한다.
문서객체.removeEventListener(이벤트이름, 이벤트리스너)
document.addEventListener('DOMContentLoaded', () => {
    let count = 0;
    let isConnect = false;

    const h1 = document.querySelector('h1');
    const p = document.querySelector('p');
    const connectButton = document.querySelector('#connect')
    const disconnectButton = document.querySelector('#disconnect')

    const listener = (e) => {
        h1.textContent = `click:${count++}`;
    }

    connectButton.addEventListener('click', () => {
        if (isConnect === false) {
            isConnect = true;
            h1.addEventListener('click', listener);
            p.textContent = `이벤트상태:${isConnect}`
        }
    })

    disconnectButton.addEventListener('click', () => {
        if (isConnect === true) {
            isConnect = false;
            h1.removeEventListener('click', listener);

            p.textContent = `이벤트상태:${isConnect}`

        }
    })
})
이벤트 모델
사전 html기본을 알고 있어야 한다. 이제 지금까지 배운 것을 전부 활용해보자
이벤트를 연결하는 방법을 이벤트 모델이라고 한다. 이건 두 가지로 나뉜다.
표준이벤트 모델 : addEvenetListener
고전이벤트 모델 : 문서객체 onxx 시작하는 속성에 이벤트 연결하는 것
인라인이벤트 모델 : html요소에 함수를 넣는 것
const listener = (event) => {...}
<div onkeyup="listener(event)" ></div>
사실 표준이벤트를 많이 쓰고, 요즘은 인라인이벤트도 조금씩 쓰고 있다.
키보드 이벤트
| 이벤트 | 설명 |
|---|---|
| keydown | 키가 눌릴 때 실행. 꾹 누를 때, 입력될 때. 한국어 처리는 못할 때가 있음 |
| keypress | 키가 입력되었을 때 실행. 아시아권 문자는 처리 못할 때도 있음 |
| keyup | 키보드에서 키가 떨어질 때 실행 |
일반적으로 keyup을 사용한다. 하지만 꾹 눌렀을 때 글씨를 세지 못하는 문제가 있다.
document.addEventListener('DOMContentLoaded' () => {
    const textArea = document.querySelector('textarea');
    const h1 = document.querySelector('h1');

    textArea.addEventListener('keyup', (e) => {
        const length = textArea.value.length
        h1.textContent = `글자수:${length}`
    })
})
키보드 키코드
키보드 이벤트가 발생할 때는 이벤트 객체로 어떤 키를 눌렀는지를 알 수 있다.
| 이벤트 속성 이름 | 설명 |
|---|---|
| code | 입력한 키 |
| keyCode | 입력한 키를 나타내는 숫자 |
| altKey | alt키를 눌렀는지 |
| ctrlKey | ctrl키를 눌렀는지 |
| shiftKey | shift키를 눌렀는지 |
code 속성은 입력한 키에 대한 문자열이 들어있고 altKey, ctrlKey 등은 boolean값이 들어있다.
<!DOCTYPE html>
<html lang="en">
<head>
<script>
document.addEventListener('DOMContentLoaded', () => {
    const h1 = document.querySelector('h1')
    const print = (e) => {
        let output = ''
        output += `alt:${e.altKey}<br>`
        output += `ctrl:${e.ctrlKey}<br>`
        output += `shift:${e.shiftKey}<br>`
        output += `code:${typeof(e.code) !== 'undefined' ? e.code : e.keyCode}<br>`
        h1.innerHTML = output;
    }

    document.addEventListener('keydown', print)
    document.addEventListener('keyup', print)
})
</script>
<style>
    h1 { user-select: none;}
</style>
</head>
<body>
    <hr>
    <textarea></textarea>
    <h1></h1>
    <hr>
</body>
</html>
별을 이동시키는 게임을 구현할 때는 keydown을 많이 사용한다. 꾹누르는 것을 지원해줘야하기 때문.
document.addEventListener('DOMContentLoaded', () => {
    const star = document.querySelector('h1')
    star.style.position = 'absolute'

    let [x, y] = [0, 0]
    const block = 20
    const print = () => {
        star.style.left = `${x * block}px`
        star.style.top = `${y * block}px`
    }
    print()

    const [left, up, right, down] = [37,38,39,40]
    document.body.addEventListener('keydown', (e) => {
        switch (e.keyCode)
        {
            case left:
                x -= 1
                break
            case up:
                y -= 1
                break
            case right:
                x += 1
                break
            case down:
                y += 1
                break
        }
        print()
    })
})
이벤트 발생객체
이벤트 리스너 함수를 외부로 빼낸 경우 변수 접근 문제가 생길 수 있습니다. 이럴 때 어떻게 해결할까용
- event.currentTarget 속성을 사용합니다.
- this키워드를 사용합니다.
화살표 함수가 없을 때는 2번째 방법을 많이 사용했지만, 지금은 둘 다 많이 사용합니다. 라이브러리와 프레임워크에 따라 선호하는 방식이 다릅니다.
const listener = (event) => {
    const len = event.currentTarget.value.length
    const h1 = document.querySelector('h1')
    h1.textContent = `글자수:${len}`
}

document.addEventListener('DOMContentLoaded', () => {
    const textArea = document.querySelector('textarea')
    textArea.addEventListener('keyup', listener)
})
글자 입력 양식 이벤트
사용자로부터 어떠한 입력을 받을 때 사용하는 요소를 form이라고 합니다.
input, textarea, button, select 태그 등이 모두 입력양식입니다.
document.addEventListener('DOMContentLoaded', () => {
    const input = document.querySelector('input')
    const button = document.querySelector('button')
    const p = document.querySelector('p')

    button.addEventListener('click', () => {
        const inch = Number(input.value)

        if (isNaN(inch))
        {
            p.textContent = 'not a number'
            return
        }
        const cm = inch * 2.54
        p.textContent = cm;
    })
})
들여쓰기를 줄이면 코드가 깔끔해집니다. else문은 최대한 안쓰는 게 좋죠.
드롭다운
select 태그와 option태그를 통해 구현할 수 있습니다. 이건, value도 사용이 가능하긴 한데, 보통 options와 index를 통해 접근하는게 더 안전한 거 같습니다.
document.addEventListener('DOMContentLoaded', () => {
    const select = document.querySelector('select')
    const p = document.querySelector('p')

    select.addEventListener('change', (e) => {
        const value = e.currentTarget.value;
        const idx = e.currentTarget.selectedIndex;

        p.textContent = `choice:${value}`
    })
})
여기서 multiple 속성을 부여하면 select박스의 아이템을 여러개 선택할 수 있습니다. 보통 체크박스가 낫습니다.
ch8 예외처리
'Etc > 도서' 카테고리의 다른 글
| <소문난 명강의> 크리핵티브의 한 권으로 끝내는 웹 해킹 바이블 (0) | 2025.10.27 |
|---|---|
| [혼공학습단] 후기 (0) | 2025.08.24 |
| [혼공스] 5주차 > Chapter6(객체) (4) | 2025.08.17 |
| [도서리뷰] 개발자를 위한 IT 영어 온보딩 가이드 (3) | 2025.07.27 |
| [도서리뷰] 일잘러의 비밀, 챗GPT와 GPTs로 나만의 AI챗봇 만들기 (0) | 2025.03.27 |

