
Written by coh at home
[Maixbot]프로젝트 본문
Face detection, Object detection, Hand classification.
face detection 과 object detection은 yolo2 모델을 사용
line tracking은 hough transform을 이용한다. (ROI를 가져오고 gray scale, blur, canny edge, hough transform을 적용)
hand classification은 classifier를 이용해 모델을 하나 만들고 이용한다.
그중에서도 나는 hand classifier를 통한 가위바위보 제스쳐 인식 project를 진행했다.
모델을 학습시키기 위한 데이터를 얻기 위해
https://teachablemachine.withgoogle.com/train/image
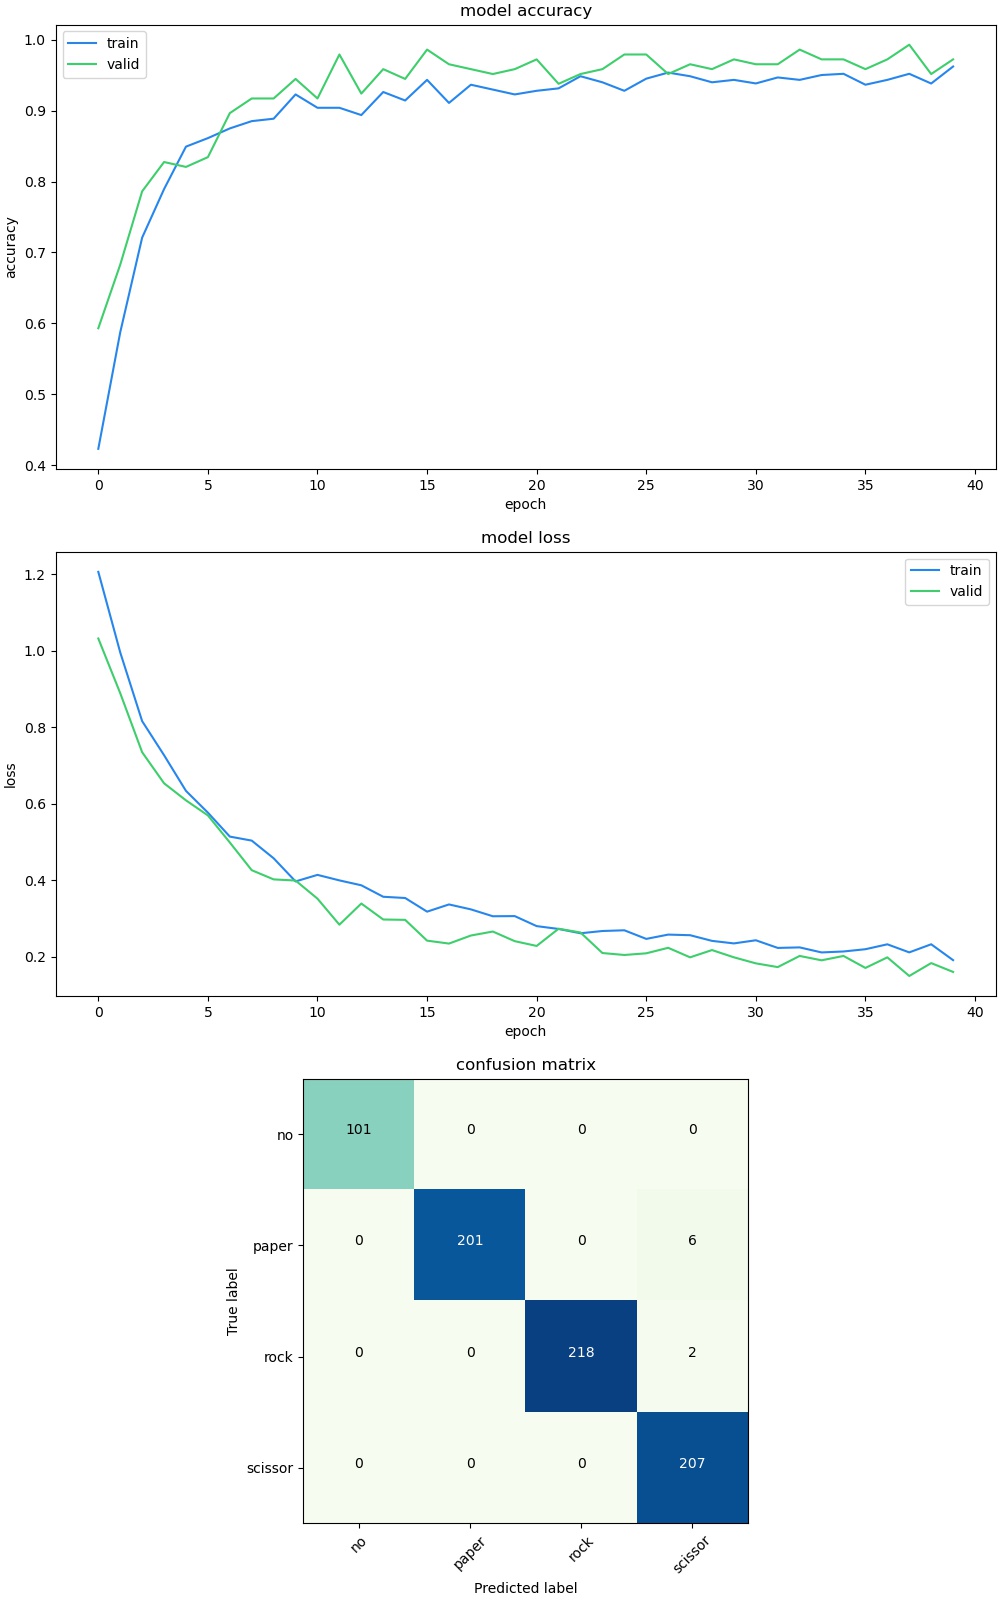
에서 가위바위보 데이터를 얻어오고 학습을 시켰다.
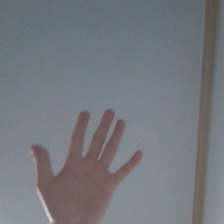
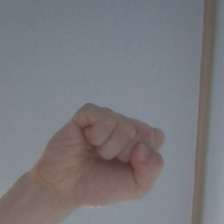

대충 각각 200장씩 얻어왔는데 모델 학습 후 실제 디바이스에서 발생한 문제점들은 인식률이 특정 장소, 특정 각도에서는 뛰어나지만 그 외의 장소에서는 떨어진다는 문제점이 있었다.
얻은 교훈은 2가지이다.
1. 여러가지 배경에서 데이터를 얻어야 한다.
2. 손의 각도도 여러가지로 데이터를 얻어야 한다.
이를 학습시킨 결과물이다.
# object classifier boot.py
# generated by maixhub.com

import sensor, image, lcd, time
import KPU as kpu
from Maix import GPIO
from fpioa_manager import fm
from board import board_info
from machine import Timer,PWM
import gc, sys

# 로봇의 동작을 위한 부분
tim1 = Timer(Timer.TIMER0, Timer.CHANNEL0, mode=Timer.MODE_PWM)
tim2 = Timer(Timer.TIMER0, Timer.CHANNEL1, mode=Timer.MODE_PWM)
tim3 = Timer(Timer.TIMER0, Timer.CHANNEL2, mode=Timer.MODE_PWM)
tim4 = Timer(Timer.TIMER0, Timer.CHANNEL3, mode=Timer.MODE_PWM)

ch1 = PWM(tim1, freq=256, duty=50, pin=24)
ch2 = PWM(tim2, freq=256, duty=50, pin=32)
ch3 = PWM(tim3, freq=256, duty=50, pin=13)
ch4 = PWM(tim4, freq=256, duty=50, pin=12)

duty = 0
ch1.duty(duty)
ch2.duty(duty)
ch3.duty(duty)
ch4.duty(duty)

def straight():
    ch1.duty(90)
    ch2.duty(0)
    ch3.duty(0)
    ch4.duty(90)

def right_move():
    ch1.duty(90)
    ch2.duty(0)
    ch3.duty(0)
    ch4.duty(0)

def left_move():
    ch1.duty(0)
    ch2.duty(0)
    ch3.duty(0)
    ch4.duty(90)

def stop():
    ch1.duty(0)
    ch2.duty(0)
    ch3.duty(0)
    ch4.duty(0)


fm.register(21, fm.fpioa.GPIOHS0)
btn = GPIO(GPIO.GPIOHS0, GPIO.IN ,GPIO.PULL_UP)


sensor_window=(224, 224)
lcd_rotation=0
sensor_hmirror=False
sensor_vflip=True

sensor.reset()
sensor.set_pixformat(sensor.RGB565)
sensor.set_framesize(sensor.QVGA)
sensor.set_windowing(sensor_window)
sensor.set_hmirror(sensor_hmirror)
sensor.set_vflip(sensor_vflip)
sensor.run(1)

lcd.init(type=1)
lcd.rotation(lcd_rotation)
lcd.clear(lcd.WHITE)

state_previous = 1
count = 0

try:
    img = sensor.snapshot()
    lcd.display(img)
except Exception:
    img = image.Image(size=(320, 240))
    img.draw_string(90, 110, "loading model...", color=(255, 255, 255), scale=2)
    lcd.display(img)

task = kpu.load(0x300000)

labels = ["no", "paper", "rock", "scissor"]

try:
    while(True):
        img = sensor.snapshot()
        state_current = btn.value()
        # button control
        if state_current == 0:
            if state_previous == 1:
                count = count + 1
                state_previous = 0
                ch1.duty(0)
                ch2.duty(0)
                ch3.duty(0)
                ch4.duty(0)
                img.clear()
                img.draw_string(80,100,"END", color=(255, 0, 0),scale=4)
                lcd.display(img)
                break
        t = time.ticks_ms()
        fmap = kpu.forward(task, img) #model 동작
        t = time.ticks_ms() - t
        plist=fmap[:] #확률값을 받아옴.
        pmax=max(plist)
        pmin=min(plist)
        max_index=plist.index(pmax)
        # (0,0) 위치에 인식한 확률, label을 2의 크기로 적어줘
        img.draw_string(0,0, "%.2f : %s " %(pmax, labels[max_index].strip()), scale=2)
        if max_index == 0 :
            stop()
        elif max_index == 1 :
            straight()
        elif max_index == 2 :
            left_move()
        elif max_index == 3 :
            right_move()
        time.sleep_ms(10)
        img.draw_string(0,25, "min: %.2f" %(pmin), scale=2)
        img.draw_string(0, 200, "t:%dms" %(t), scale=2)
        lcd.display(img)
except Exception as e:
    sys.print_exception(e)
동작은 총 4가지이다.
no : stop
paper : straight
rock : left
scissor : right
-느낀점
기술의 발전은 참 빠르다. 그리고 그 기술을 통해 기존의 design을 새롭게 변경시키는 것이 공학자가 해야할 일이라고 생각한다. 이를 design thinking이라 한다.
지금은 제스쳐를 통해 간단한 움직임을 제어하고 있지만 만약 더 고차원적인 서비스를 제공하게 된다면
장애인분들의 생활 보조, 의사소통 보조 등등의 활용이 가능할 것이라고 생각된다.
이번에 강의를 들으면서 이론적으로만 알던 딥러닝을 실생활 device에 적용시킬 수 있었고
세세하게 설명을 해주신 교수님 덕분에 앞으로의 설계과제에 있어서 많은 도움이 될 것 같다.
감사합니다.
'Advanced > Maixbot Project' 카테고리의 다른 글
| [Maixbot]딥러닝 모델 실습 (0) | 2023.07.11 |
|---|---|
| [Maixbot] camera & LCD (0) | 2023.07.10 |
| [Maixbot]Analog output (0) | 2023.07.10 |
| [Maixbot]Analog IO (0) | 2023.07.10 |
| [Maixbot]AI concept review with CNN (0) | 2023.07.07 |


